DNS Probe Finished No Internet
When you try to access any website on your computer by typing its Domain Name (Say “YouTube”), the computer relies upon the DNS Server to match the requested Domain Name to its IP Address. If your computer is displaying “DNS Probe Finished No Internet” Error message, it is basically trying to inform you that it is unable to process your request, due to connectivity problems at DNS Level. This issue can be caused by a variety of reasons, ranging from minor software glitches, Network connectivity issues to DNS Servers of your Internet Service Provider being busy or going through problems.
1. Clear Browser Cache
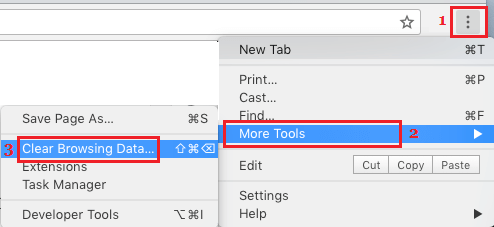
Open Chrome Browser > click on 3-dots menu icon > hover mouse over More Tools and click on Clear Browsing Data… option.
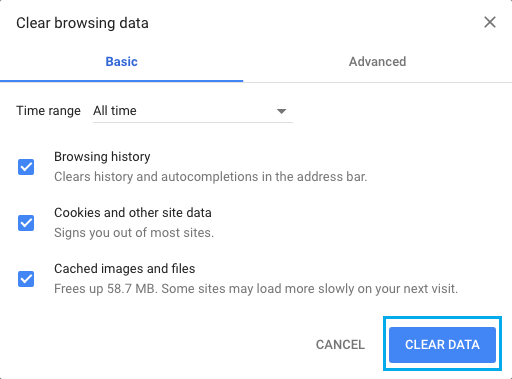
On the next screen, select All Time as the Time Range and click on Clear Data button.
2. Power Flush Modem/Router
Before going ahead with other troubleshooting steps, it is recommended that you power cycle the Modem/Router. Unplug the Modem/Router from its Power Supply Source and wait for 60 seconds. After 60 seconds, plug the Router/Modem back to its Power Supply Source. Wait for the Router/Modem to fully restart (all lights switched ON) and see if you can now connect to internet, without encountering any error messages.
3. Reset Network Adapter (Winsock Reset)
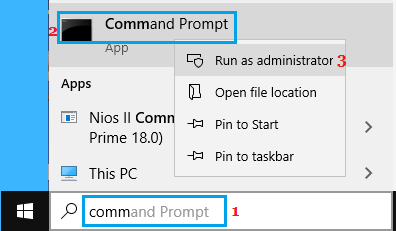
Type Command Prompt in the search bar > right-click on Command Prompt and select Run as Administrator option.
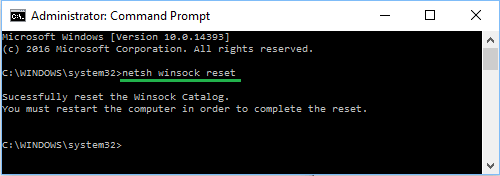
In Command Prompt window, type netsh winsock reset and press the Enter key.
After the Command is executed, close Command Prompt window and Restart your computer. After computer restarts, try to connect to internet and see if you are still getting “DNS Probe Finished No Internet” error.
4. Update Network Adapter Driver
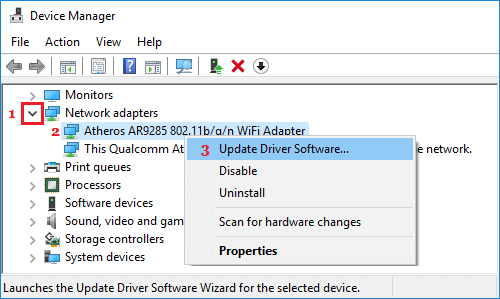
Right-click on Start button and click on Device Manager. On Device Manger Screen, expand Network Adapters entry > right-click on WiFi Adapter and click on Update Driver Software option.
Tip: If you see multiple entries, look for something that reads Network, 802.11b or has WiFi in it. On the next screen, select Search Automatically for Updated Driver Software option and follow the instructions.
5. Flush DNS and Renew IP Address
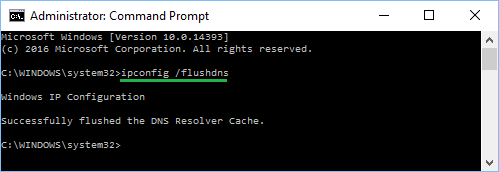
Open Command Prompt as Admin > Type ipconfig /flushdns in Command Prompt window and press the Enter key.
Similarly, type netsh int ip reset and press the Enter key > type ipconfig /release and press Enter key > type ipconfig /renew and press the Enter key. Close Command Prompt window and Restart the computer.
6. Disable Proxy Servers
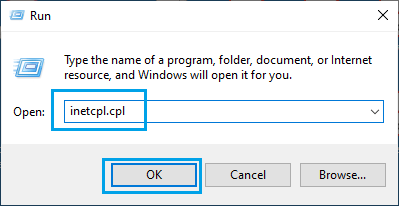
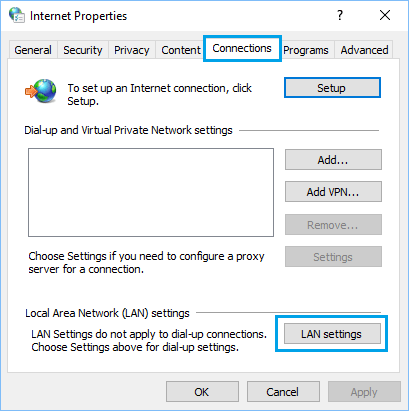
A common reason for network connectivity issues is due to use of Proxy Server Settings. Right-click on the Start button and click on Run. In Run Command window, type inetcpl.cpl and click on OK.
On internet Properties screen, select Connections tab and click on LAN Settings button.
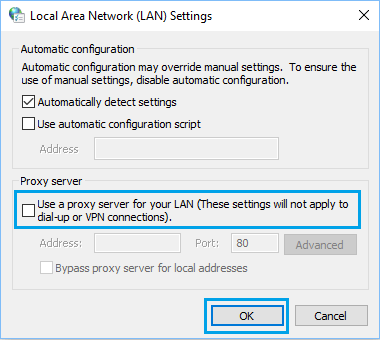
On the next screen, uncheck Use a Proxy server for your LAN option under ‘Proxy Server’ section.
Note: Make sure Automatically detect settings option is selected. Click on OK to save the settings on your computer.
7. Switch DNS Servers
If you are frequently dealing with poor network connectivity on your computer, the problem could be due to DNS Servers of your Internet Service Provider being busy or going through problems. In such cases, this problem can be easily fixed by switching to Google’s Public DNS service or to other Free DNS Service Providers like OpenDNS or Cloudflare. You can refer to this guide: How to Change DNS Servers in Windows 10 for the exact steps to change DNS Servers on your computer.
How to Use Chromecast on Windows Computer & Mac How to Change Desktop Background in Windows 10
